
Understanding the Basics of 3D Wallpapers
Immerse yourself in the transformative world of 3D wallpapers. These aren't just your average wall coverings; they're an innovative way to add depth, texture, and personality to your living space. Whether you're a seasoned DIY enthusiast or a beginner looking to dip your toes into the world of home decor, understanding the basics of 3D wallpapers can open up a realm of design possibilities.
So, what makes 3D wallpapers so special? Unlike traditional wallpapers, 3D wall panels and 3D wall tiles create a dynamic visual effect that can make your walls pop. They can transform a flat, uninspiring wall into a captivating feature that draws the eye and sparks conversation. From geometric designs to organic shapes, the variety of 3D wall decor panels available means there's something to suit every style and taste.
But how do you go about installing these innovative wall coverings? And what if you want to change things up and remove your 3D wallpapers? Don't worry, we've got you covered. This article will guide you through the process of how to remove 3D wallpapers, choosing the best 3D wallpapers for home, and the ins and outs of DIY 3D wall panel installation. We'll also explore the versatility of 3D wall tiles and the aesthetic appeal of 3D decorative wall panels.
Ready to revolutionize your home decor? Let's dive in and discover the transformative power of 3D wallpapers.
The Art of Removing 3D Wallpapers Safely
Now that we've explored the transformative power of 3D wallpapers, let's delve into the art of removing them safely. Whether you're looking to refresh your decor or simply want to try a new design, knowing how to remove 3D wallpapers is a crucial skill.
Firstly, it's important to remember that patience is key. Rushing the process could damage your walls or the 3D wall panels themselves. Start by locating a corner or edge of the panel and gently pull it away from the wall. If it doesn't come off easily, don't force it. Instead, use a hairdryer on a low heat setting to warm the adhesive and make it easier to peel off.
Once you've removed the 3D wall panel, you'll likely be left with some adhesive residue. A simple solution of warm water and dish soap applied with a sponge should do the trick. For stubborn spots, a plastic scraper can be used, but be careful not to gouge the wall.
Remember, the goal is to leave your wall as smooth and clean as possible, ready for your next design adventure. Whether you're planning to install a new set of 3D wall decor panels or switch to 3D wall tiles, a clean surface is essential for a flawless finish.
So, are you ready to change up your space? With the right knowledge and a bit of patience, you can safely remove your 3D wallpapers and open up a world of new design possibilities. From the best 3D wallpapers for home to DIY 3D wall panel installation, the choice is yours. Let your creativity run wild and transform your home into a 3D masterpiece.
Choosing the Best 3D Wallpapers for Your Home
Now that you're armed with the knowledge of how to remove 3D wallpapers, it's time to explore the exciting world of choosing the best 3D wallpapers for your home. The beauty of 3D wall decor panels lies in their versatility. From subtle textures to bold geometric patterns, there's a design to suit every taste and style.
But how do you choose the perfect 3D wall panel for your space? It's all about balance. Consider the size of your room, the amount of natural light, and the existing color scheme. A large room with plenty of natural light can handle a bold, dramatic design, while a smaller space might benefit from a more subtle 3D wall panel. Remember, the goal is to enhance your space, not overwhelm it.
When it comes to color, don't be afraid to think outside the box. Why not opt for a metallic 3D wall panel to add a touch of glamour? Or perhaps a vibrant, colorful design to inject some fun into your space? The possibilities are endless.
And let's not forget about the practical aspects. Look for 3D wall panels that are easy to install and maintain. A DIY 3D wall panel installation can be a fun and rewarding project, but it's important to choose a product that aligns with your skill level.
Finally, consider the longevity of the design. While it's fun to follow trends, it's also wise to choose a design that you'll love for years to come. After all, the best 3D wallpapers for home are the ones that make you smile every time you walk into the room.
So, are you ready to embark on your 3D wallpaper journey? With a world of designs at your fingertips, there's never been a better time to transform your home into a 3D work of art.
DIY: Your Guide to 3D Wall Panel Installation
Stepping into the realm of DIY 3D wall panel installation can be an exhilarating journey. It's not just about transforming your space, but also about the sense of accomplishment that comes with completing a project with your own hands. So, how do you navigate this exciting DIY adventure? Let's dive in.
Firstly, it's essential to understand that every 3D wall panel is unique, just like your home. Whether you've chosen subtle 3D wall tiles or opted for the grandeur of 3D decorative wall panels, each will come with its own set of installation instructions. It's crucial to follow these to the letter, to ensure your panels look their best and last for years to come.
Before you begin, gather all the necessary tools. This usually includes a level, tape measure, adhesive, and a utility knife. It's also a good idea to have a friend on hand to help, especially when installing larger panels. Remember, preparation is key when it comes to DIY 3D wall panel installation.
Next, prepare your wall. This step is often overlooked, but it's vital for a smooth and successful installation. The wall should be clean, dry, and flat. If you're installing 3D wall panels over existing wallpaper, ensure it's securely adhered to the wall. Any loose or peeling sections should be removed or reattached.
Once your wall is ready, it's time to apply the panels. Start from the top and work your way down, checking with a level as you go to ensure the panels are straight. Apply adhesive to the back of each panel and press firmly onto the wall. Hold for a few seconds to allow the adhesive to take hold. Repeat this process until your wall is covered in beautiful 3D panels.
Finally, step back and admire your handiwork. The transformation will be remarkable, and the satisfaction of knowing you did it yourself? Priceless. So, are you ready to take the plunge into DIY 3D wall panel installation? With a little patience and preparation, you'll be well on your way to creating a stunning 3D masterpiece in your own home.
Exploring the Versatility of 3D Wall Tiles
Now that you're well-versed with the basics of DIY 3D wall panel installation, let's delve into the fascinating world of 3D wall tiles. These versatile pieces are not just about aesthetics, but also about flexibility and adaptability. Whether you're planning to revamp your living room or give your bedroom a fresh look, 3D wall tiles are your go-to solution.
One of the most striking features of 3D wall tiles is their ability to be removed and reinstalled. Yes, you read that right! If you're someone who loves to experiment with your home decor or if you're moving to a new place, you don't have to say goodbye to your favorite 3D wall panels. Learning how to remove 3D wallpapers can be a game-changer, allowing you to take your beloved designs with you wherever you go.
Imagine having the freedom to transform your space whenever you wish. One day, you could have a chic, minimalist design with subtle 3D wall tiles, and the next, you could switch to a bold, dramatic look with 3D decorative wall panels. The possibilities are endless!
But how do you ensure a smooth transition when removing and reinstalling your 3D wall tiles? The key lies in careful removal. Use a utility knife to gently lift the edges of the panels, taking care not to damage the wall or the panel itself. Once removed, clean the back of the panel and the wall surface before reinstalling. Remember, the wall surface should be clean, dry, and flat for the best results.
So, are you ready to explore the versatility of 3D wall tiles? With the right approach and a bit of creativity, you can create a dynamic, ever-changing space that truly reflects your personality. After all, your home should be as unique and dynamic as you are.
Revamping Your Space with 3D Wall Decor Panels
Stepping into the realm of 3D wall decor panels, you're about to embark on a journey of endless design possibilities. These panels, far from being static elements, offer a dynamic and transformative approach to home decor. The beauty of 3D wall decor panels lies in their versatility and the ease with which they can be removed and reinstalled, allowing you to revamp your space as often as you wish.
Imagine the thrill of changing your home's ambiance with the seasons, or even on a whim. One month, your living room could be adorned with a serene forest-themed 3D wall panel, and the next, you could be basking in the warm, vibrant colors of a tropical beach scene. The best part? You don't need to be a professional decorator to achieve these transformations. With a little patience and the right tools, you can master the art of DIY 3D wall panel installation.
But what about the process of removing your 3D wallpapers? Fear not, for it's simpler than you might think. As we've discussed earlier, a utility knife is your best friend in this process. Gently lift the edges of the panels, taking care not to damage the wall or the panel itself. Once removed, clean the back of the panel and the wall surface before reinstalling. Remember, the wall surface should be clean, dry, and flat for the best results.
And there you have it! With the knowledge of how to remove 3D wallpapers and the courage to experiment with different 3D wall decor panels, you're well on your way to creating a home that's as dynamic and unique as you are. So, are you ready to take the plunge and transform your space with the best 3D wallpapers for home?
Perhaps you're wondering where to find these magical 3D decorative wall panels. Look no further than Whole 3D's extensive collection. From subtle, minimalist designs to bold, dramatic patterns, we've got something for every taste and style. So why wait? Start your journey of transformation today with Whole 3D!

The Aesthetic Appeal of 3D Decorative Wall Panels
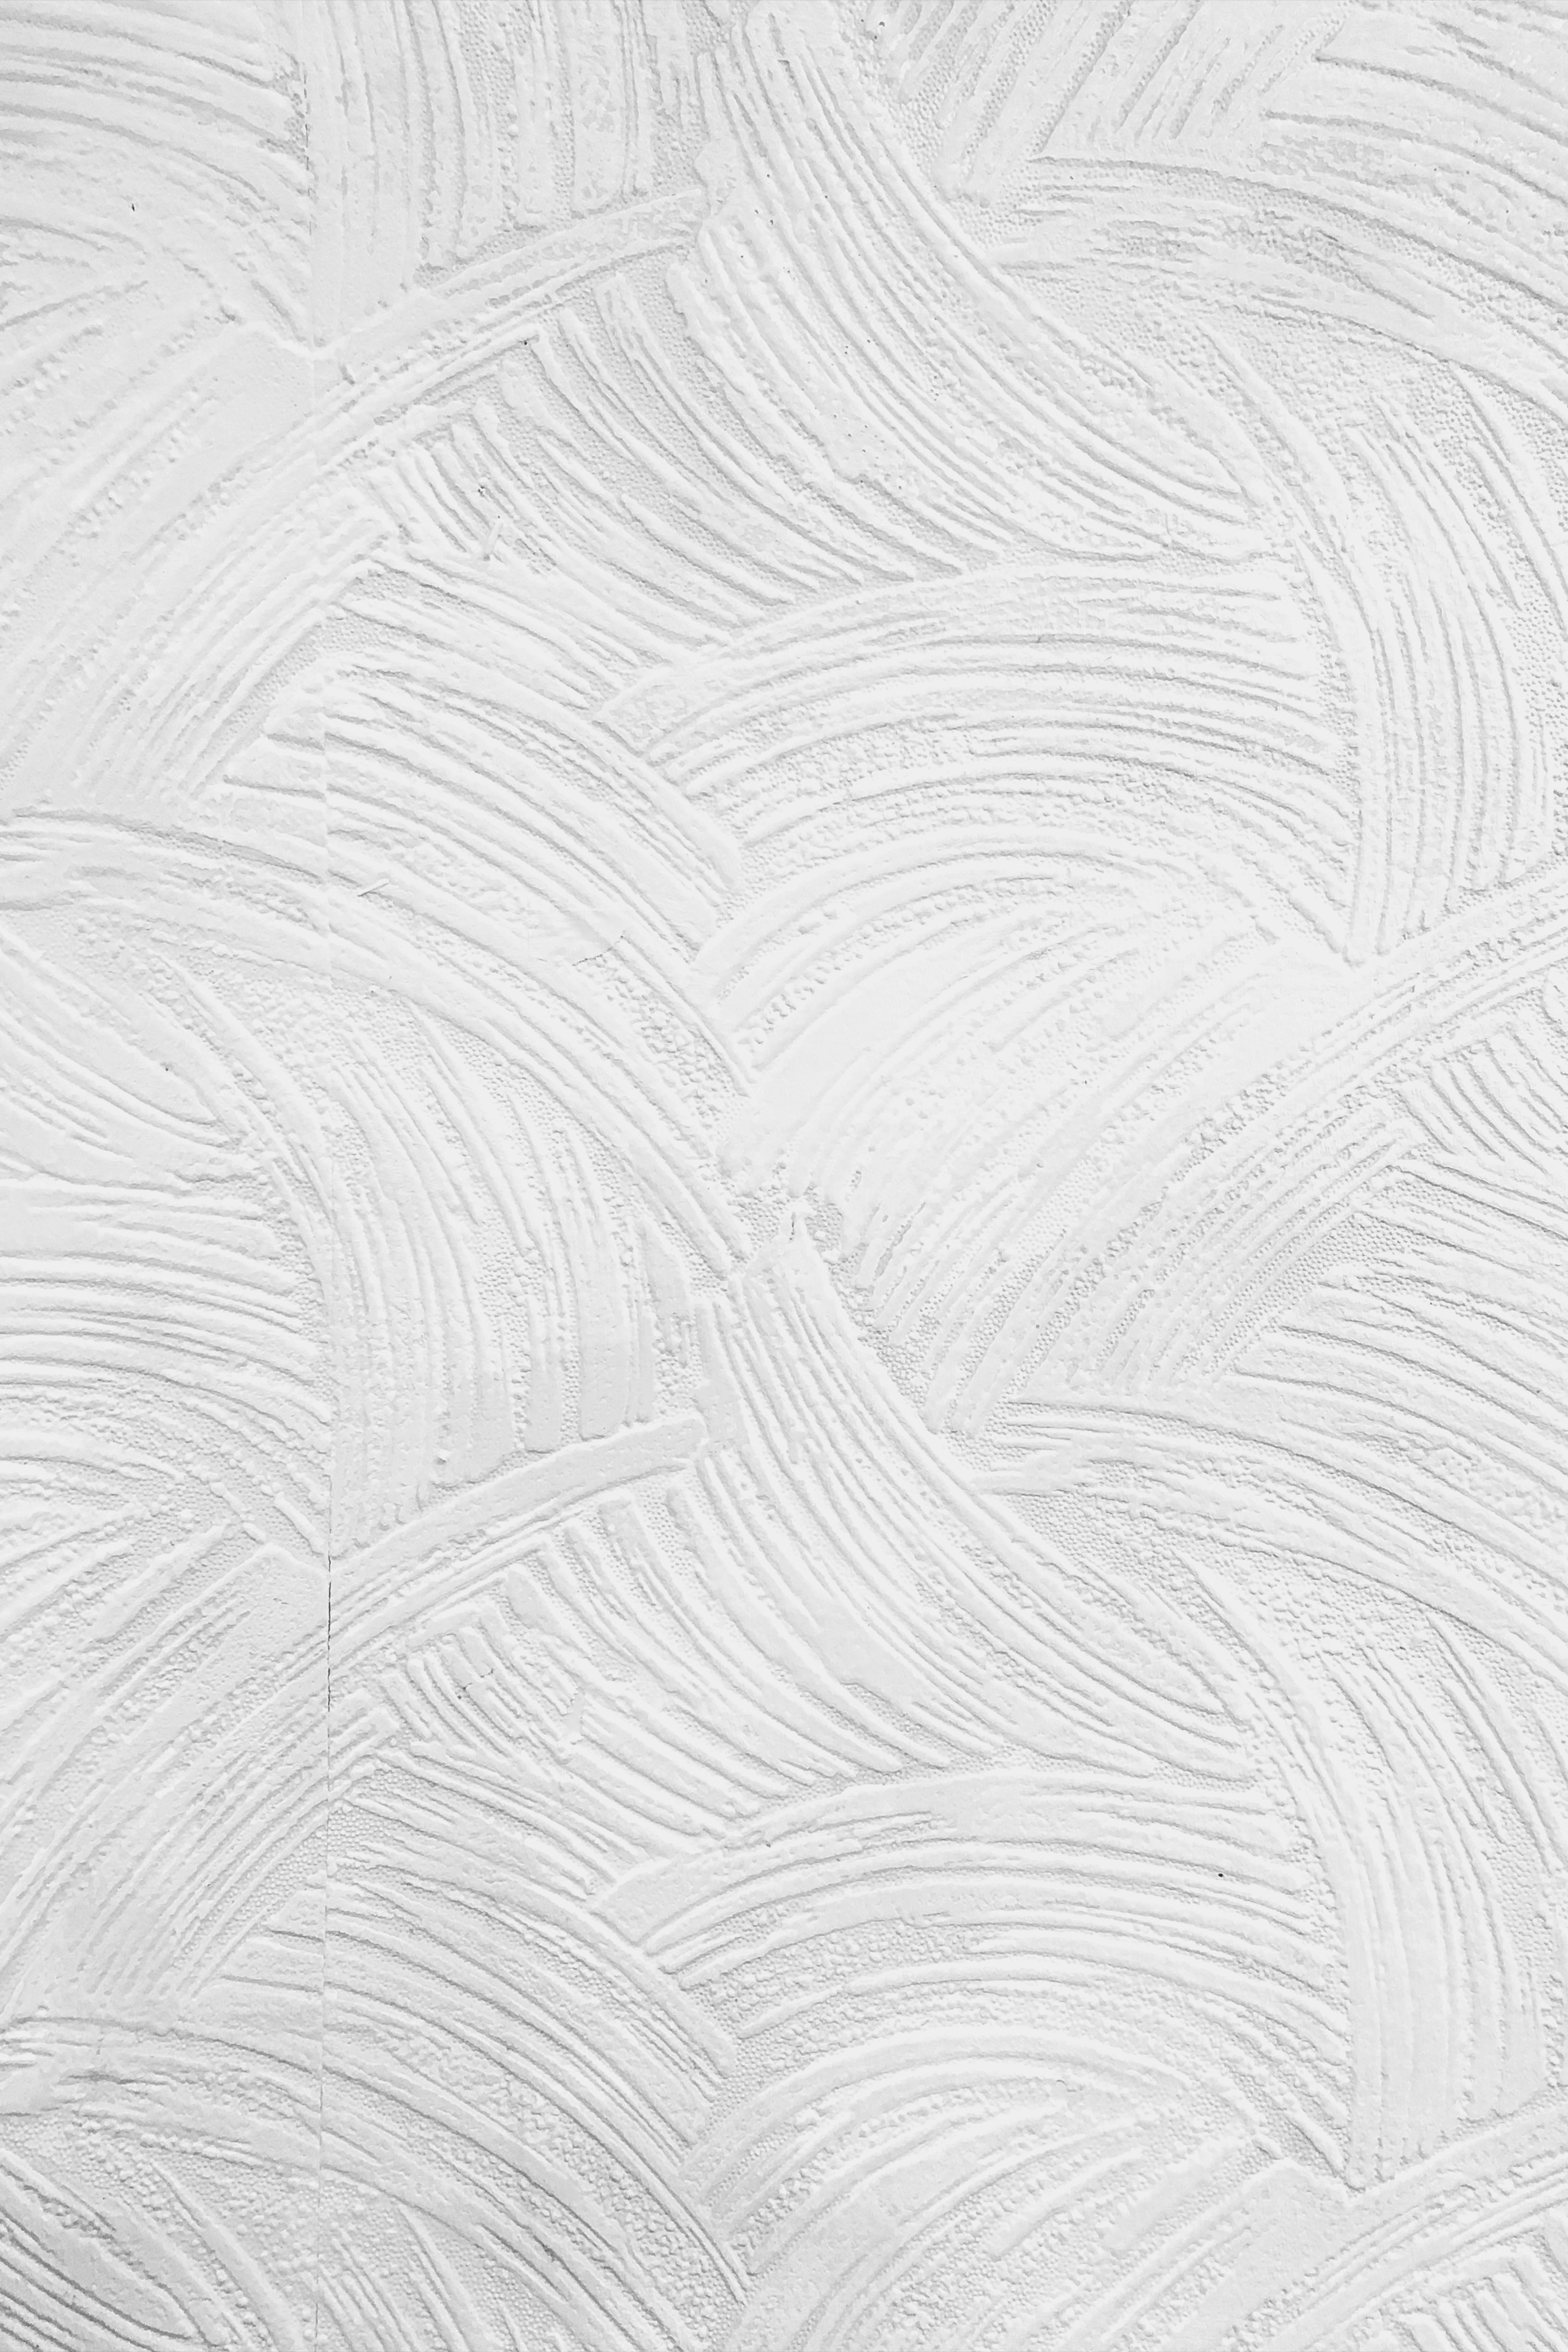
Stepping into the final chapter of our journey, let's delve into the aesthetic appeal of 3D decorative wall panels. These aren't just wall coverings; they're art pieces that add depth, texture, and character to your living spaces. The beauty of 3D wall panels is that they go beyond the flat, two-dimensional look of traditional wallpapers, creating an immersive, tactile experience that's truly transformative.
Imagine the drama of a geometric 3D wall panel in your dining room, casting intriguing shadows as the evening light filters in. Or the soothing ambiance of a wave-patterned 3D wall decor panel in your bedroom, creating a serene retreat where you can unwind after a long day. The possibilities are as limitless as your imagination.
But the aesthetic appeal of these panels isn't limited to their stunning designs. The best 3D wallpapers for home also offer a tactile experience that's simply unmatched. Running your fingers over the textured surface, you can feel the craftsmanship and attention to detail that goes into each panel. It's a sensory delight that adds a whole new dimension to your home decor.
And let's not forget the practical benefits. 3D wall panels are durable, easy to clean, and perfect for hiding wall imperfections. They're also surprisingly easy to install and remove, making them an excellent choice for those who love to change their decor frequently.
So, are you ready to transform your home with 3D wall decor panels? Whether you're a DIY enthusiast ready to tackle 3D wall panel installation or simply looking for a quick and easy way to refresh your space, Whole 3D has got you covered. With our extensive range of designs, you're sure to find the perfect fit for your home. Start exploring today and discover the transformative power of 3D wall decor.
Remember, your home is a canvas, and you're the artist. With 3D decorative wall panels, you have the tools to create a masterpiece. So why wait? Dive into the world of 3D decor and let your creativity soar!
Dive Into the World of 3D Wallpapers: Removal and Reinstallation Made Easy
Imagine walking into a room and being greeted by a stunning 3D wall panel, a piece of art that adds depth and dimension to your space. Now imagine the freedom to change this aesthetic whenever you want, to match your mood, the season, or just for a fresh look. This is the beauty of 3D wallpapers. But how do you remove and reinstall these 3D wall decor panels without damaging them or the walls? And why is it important to follow best practices?
Whether you're a DIY enthusiast or a homeowner looking for a change, understanding the correct methods of removing and reinstalling 3D wallpapers is crucial. Not only does it ensure the longevity of your 3D wall panels, but it also preserves the integrity of your walls. And who better to guide you through this process than the experts at Whole 3D? For more information, you can check out our FAQ on installing Whole 3D wall panels.
With a wide range of the best 3D wallpapers for home, Whole 3D is your one-stop shop for all things 3D wall decor. Our easy-to-follow guides and tips on DIY 3D wall panel installation, removal, and reinstallation will empower you to transform your space at your own pace and according to your unique style. So, are you ready to dive into the world of 3D wallpapers?

🔄 The Cycle of Change: Reasons to Refresh Your 3D Wall Decor
Home is where the heart is, and it's only natural to want to keep it looking its best. But what happens when your beloved 3D wall panels need a refresh? There are numerous scenarios that might prompt you to remove and reinstall your 3D wallpapers. Perhaps you're looking to redecorate, giving your rooms a fresh, new look with the best 3D wallpapers for home. Or maybe, an unfortunate incident has led to damage that requires repair.
Seasonal changes can also inspire a transformation. Imagine swapping out a vibrant summer-themed 3D wall panel for a cozy, winter-inspired design as the seasons change. Or perhaps you're simply looking to try out a new DIY 3D wall panel installation technique you've just learned.
Whatever the reason, removing and reinstalling your 3D wall decor panels doesn't have to be a daunting task. With the right tools, a bit of patience, and Whole 3D's expert guides, you can easily refresh your space as often as you'd like. Remember, change is a part of life, and that includes your living spaces too. So why not embrace it and let your home evolve with you?
Stay tuned as we delve into the tools you'll need for this process and guide you through the steps of safely removing and reinstalling your 3D decorative wall panels. And remember, whether you're dealing with 3D wall tiles or 3D wall decor panels, Whole 3D is here to help you transform your home one panel at a time.
🛠️ Your DIY Arsenal: Essential Tools for 3D Wallpaper Makeover
Essential Tools for Your 3D Wallpaper Makeover
- Sponge: A clean, damp sponge is crucial for wiping away excess wallpaper remover solution and any residual adhesive.
- Bucket: A sturdy bucket is needed to mix your wallpaper remover solution and to rinse your sponge during the removal process.
- Wallpaper Scorer: This handy tool creates tiny perforations in the wallpaper, allowing the remover solution to penetrate and loosen the adhesive.
- Wallpaper Remover Solution: This is a specially formulated solution designed to break down the adhesive that holds your wallpaper to the wall. It's essential for easy and safe removal of 3D wallpapers.
- Plastic Scraper: A plastic scraper is used to gently peel off the wallpaper without damaging the underlying wall surface. It's especially useful when dealing with stubborn sections of wallpaper.
- Utility Knife: A sharp utility knife is useful for cutting through wallpaper, especially around tricky areas like outlets and window frames.
- Seam Roller: This tool is used to press down the wallpaper seams during installation, ensuring a smooth and professional finish.
- Wallpaper Smoother: A wallpaper smoother helps to eliminate air bubbles and wrinkles during the installation process, contributing to a flawless finish.
To safely remove your 3D wallpapers, you'll need a variety of essential tools like a sponge, bucket, wallpaper scorer, wallpaper remover solution, plastic scraper, utility knife, and...
This Wallpaper Tools Wallpaper smoothing tool with Seam Roller, Hard Squeegee, Tape Measure, and Utility Knife is a comprehensive kit that includes all the necessary tools for removing and reinstalling 3D wallpapers. The included seam roller and hard squeegee are specifically designed to ensure a smooth and professional finish during installation. With this kit, you'll have everything you need to safely and effectively remove and reinstall your 3D wallpapers.
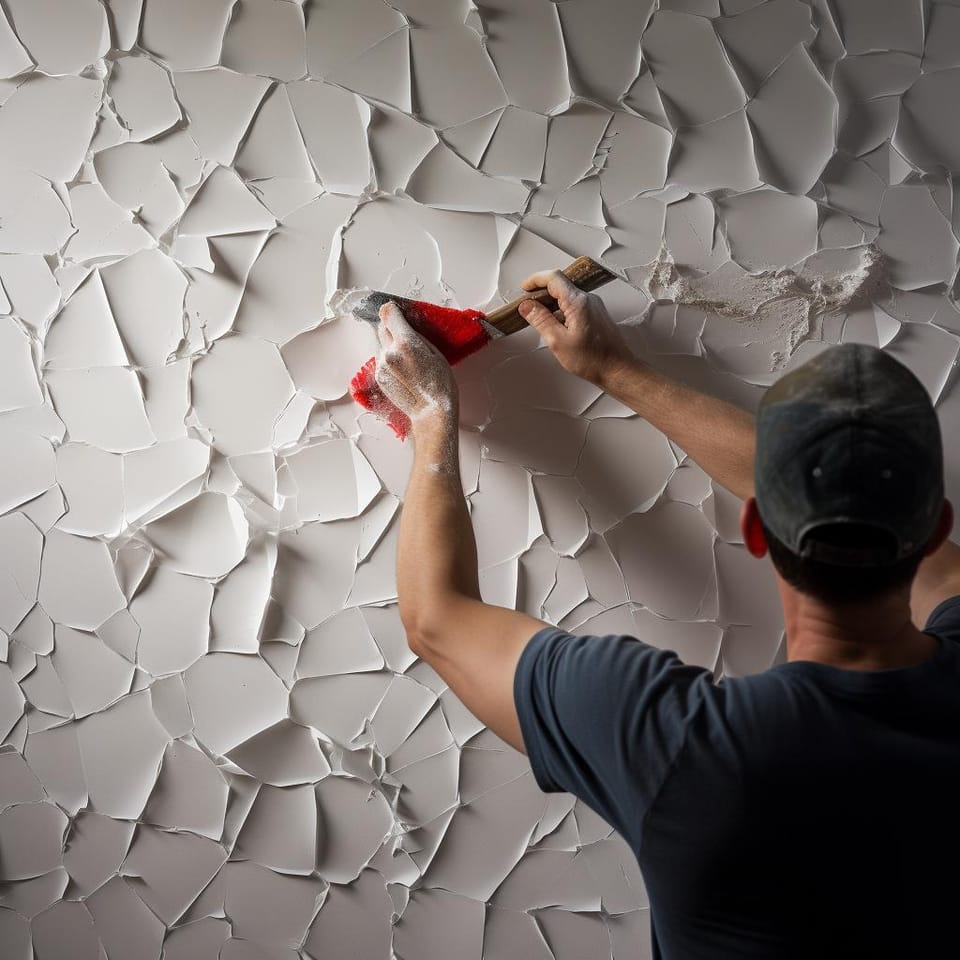
Peel, Don't Tear! A Safe Guide to Removing 3D Wallpapers
Removing 3D wallpapers can be a daunting task, especially if you're worried about damaging your walls. However, with the right approach, you can safely peel off your 3D wall decor panels without a hitch. Here's how:
Start by protecting your floor and furniture. Cover them with a drop cloth or plastic sheet to catch any falling debris or water drips. Then, prepare a mixture of warm water and wallpaper remover solution in a bucket. This mixture will help to loosen the adhesive holding your 3D wall panels in place.
Next, score your wallpaper using a wallpaper scorer. This tool creates tiny punctures in the wallpaper, allowing the solution to penetrate and soften the adhesive. Now, soak a sponge in your prepared solution and apply it generously to the scored wallpaper. Let it sit for a few minutes to allow the solution to do its magic.
Once the wallpaper starts to loosen, gently scrape it off using a plastic scraper. Remember, the keyword here is 'gently'. You don't want to damage your walls in the process. If there are stubborn patches, simply reapply the solution and give it more time to soak.
After you've removed all the wallpaper, wash the wall with warm water to remove any remaining adhesive. Let it dry completely before you proceed with your DIY 3D wall panel installation. With these steps, you can safely remove your best 3D wallpapers for home without causing any damage.
Ready to transform your space with a new look? Let's dive into the installation process in the next section.
Now that we've discussed the tools needed and the steps to safely remove your 3D wallpapers, let's take a look at a practical demonstration of the process. This video tutorial will provide a visual guide to help you understand the steps better.
The video above provides a clear, step-by-step demonstration of how to remove 3D wallpapers. After successfully removing your wallpaper, the next step is to prepare your wall for the new wallpaper. Let's move on to the preparations needed for reinstalling 3D wallpapers.
Prep Work for Perfection: Getting Your Walls Ready for 3D Wallpaper
Before you can dive into the exciting world of DIY 3D wall panel installation, it's crucial to ensure your walls are primed and ready. The first step is removing the old wallpaper, if any. Once you've mastered how to remove 3D wallpapers, it's time to prepare your canvas - the wall. If you're unsure about the process, you can refer to our installation guide.
Start by cleaning the wall thoroughly. You might be surprised at the amount of dust and grime that can accumulate over time. A simple solution of warm water and mild detergent will do the trick. Use a sponge or a soft cloth to avoid scratching the surface. Remember, cleanliness is key to ensuring the best 3D wallpapers for home adhere properly.
Once the wall is clean, it's time to let it dry. Patience is a virtue here. A dry wall ensures that your 3D wall decor panels won't peel off prematurely. While you wait, you can start preparing your new 3D wallpaper. Unroll it and let it relax to avoid any installation issues. For more tips on home renovation using 3D wall panels and decor, check out our helpful guide.
Next, inspect your wall for any imperfections. Any bumps or cracks? Now's the time to smooth them out. A bit of sandpaper can help with smaller bumps, while larger cracks might require a touch of plaster. A smooth wall is a perfect canvas for your 3D wall panels or 3D wall tiles. If you're considering a makeover, our guide on installing wood paneling might be helpful.
By following these steps, you're setting the stage for a successful 3D decorative wall panel installation. Remember, the secret to a stunning 3D wall is all in the preparation. So, are you ready to transform your space with Whole 3D?
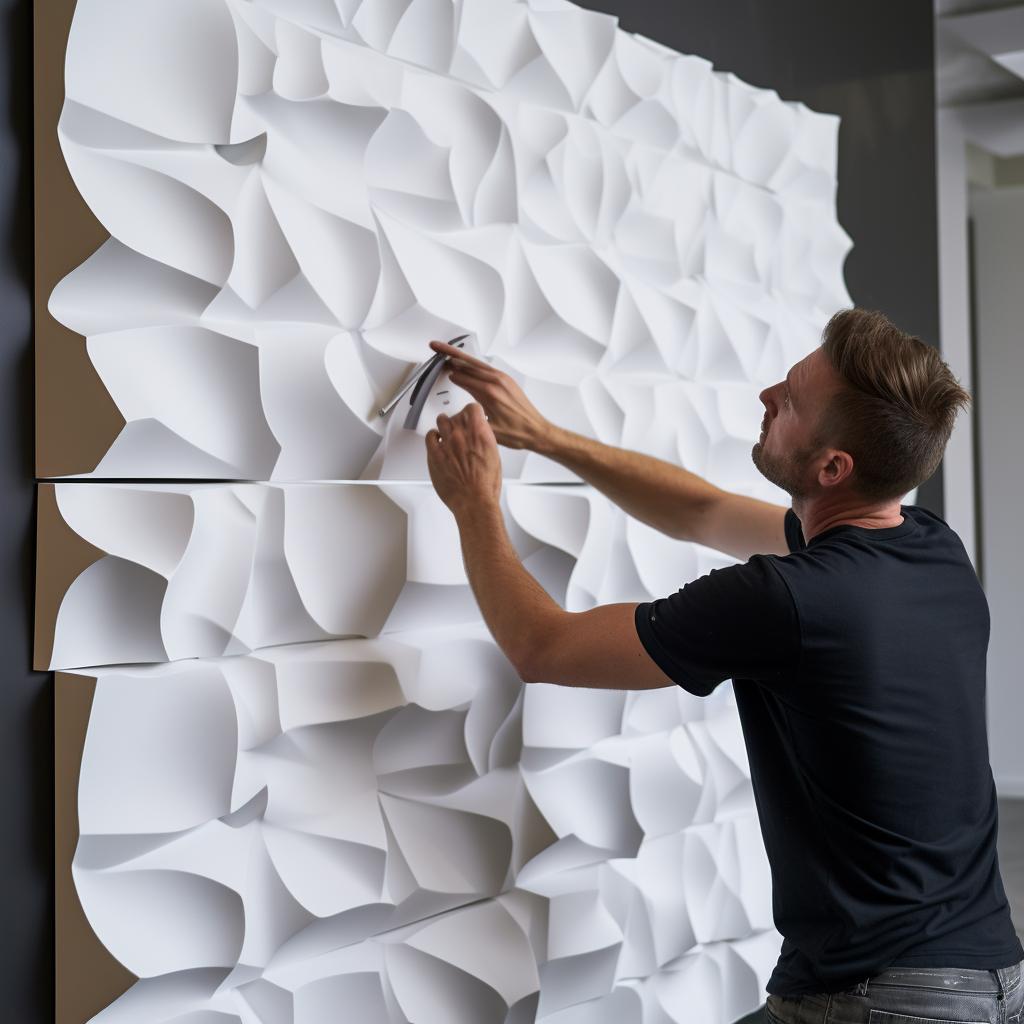
Stick It Right: Your Step-by-Step Guide to 3D Wallpaper Installation
Reinstalling your 3D wallpapers is a breeze when you follow the right steps. First, ensure that your wall is clean, dry, and smooth. Any imperfections on the wall can affect the final result, so take your time in preparing the surface. Use a mild detergent and warm water to clean the wall, then let it dry completely.
Next, prepare your 3D wall panel. Measure and cut it according to the size of your wall. It's best to leave a small allowance on all sides to ensure a perfect fit. Apply a generous amount of adhesive on the back of the panel, spreading it evenly with a brush or roller. Remember, the best 3D wallpapers for home use are those that adhere well, so don't skimp on the adhesive!
Now, it's time to install your 3D wall decor panels. Start from the top and work your way down, pressing the panel firmly against the wall. Smooth out any bubbles or wrinkles with a wallpaper smoother. Repeat the process with the next panel, making sure to match the pattern perfectly.
For a professional finish, trim the excess wallpaper at the top and bottom using a sharp utility knife. Wipe away any excess adhesive with a damp sponge. And voila! You've just completed your DIY 3D wall panel installation. Isn't it amazing how 3D wall tiles can transform your space?
Remember, practice makes perfect. Don't be disheartened if your first attempt isn't flawless. With patience and practice, you'll soon be installing 3D decorative wall panels like a pro. So, ready to give your home a 3D makeover?
Now that we've discussed the steps for reinstalling your 3D wallpapers, let's take a look at a practical demonstration. The following video provides a comprehensive tutorial on how to install 3D wallpapers like a pro.
That was an informative video, wasn't it? The process may seem daunting at first, but with practice and the right tools, you'll be able to install your 3D wallpapers flawlessly. Now that we've covered the removal and reinstallation process, let's move on to some tips and tricks for achieving the perfect finish.
Finishing Touches: Expert Hacks for Flawless 3D Wallpaper Installation
When it comes to achieving a professional finish with your 3D wall panels, the devil is in the details. The first secret lies in the removal process. Always start from the corners and peel off gently to avoid damaging the 3D wall decor panels. Using a wallpaper scorer can make this process smoother, but remember, patience is key. If you're unsure about the removal process, you can refer to our installation guide for more information.
Once you've successfully removed the 3D wallpapers, it's time to prepare for the reinstallation. This is where your DIY skills really come into play. Ensure the wall is clean, dry, and smooth before proceeding. If you're dealing with 3D wall tiles, a level tool can be your best friend to ensure perfect alignment. For more tips on how to prepare your walls for reinstallation, check out our article on customizing 3D wall panel patterns.
Now, onto the installation. When applying adhesive, less is more. Too much adhesive can cause the wallpaper to bubble or peel off prematurely. Also, consider using a wallpaper smoother for a flawless finish. Remember, the goal is to transform your home with the best 3D wallpapers for home and not just to cover up your walls. To ensure you're using the best products for your home, have a look at our guide on 3D wallpaper designs.
Lastly, don't forget to step back and admire your work from different angles. This will help you spot any inconsistencies or areas that need a little more attention. Remember, with Whole 3D's innovative 3D wall panels, you're not just installing wallpaper, you're creating a masterpiece. So, are you ready to bring your walls to life? If you're looking for more inspiration, check out our 3D wall decor ideas for your staircase.
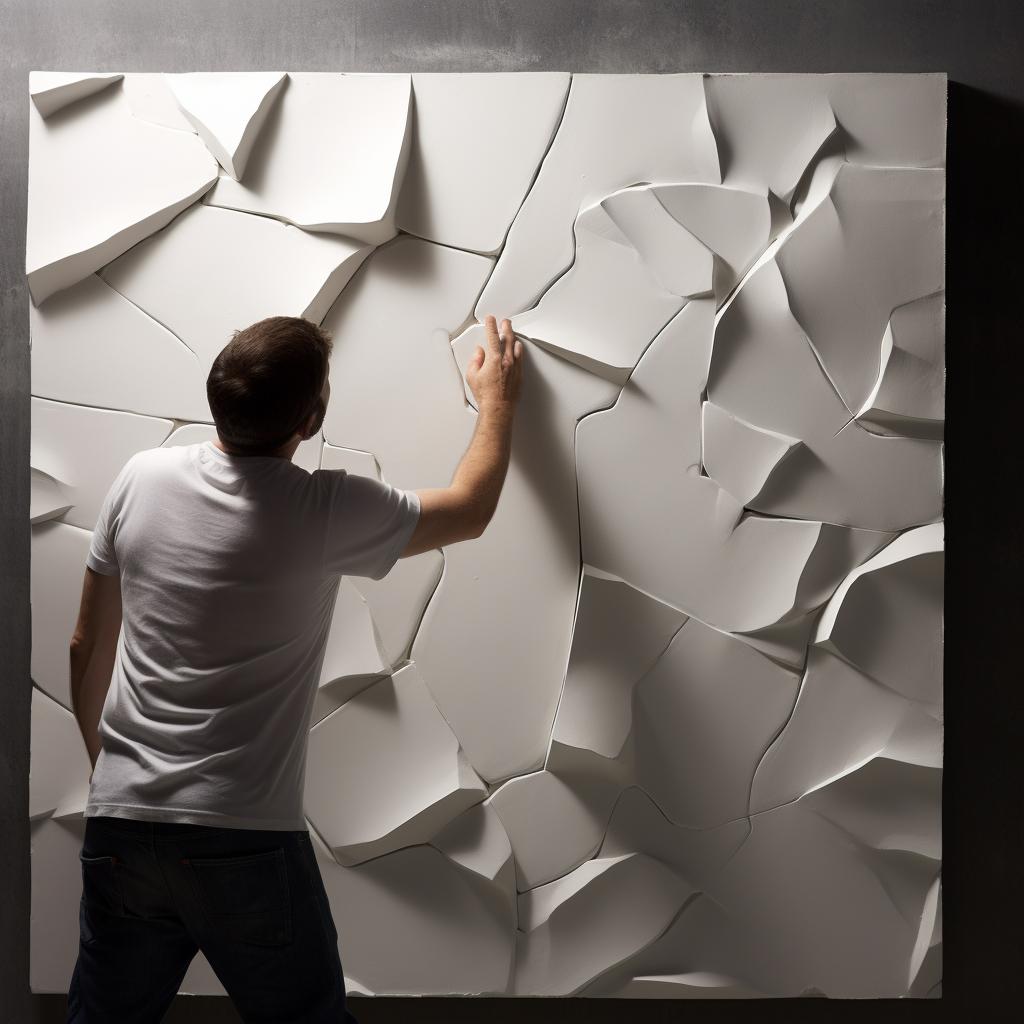
Now that we've shared some expert tips and tricks, let's take a look at how some enthusiasts have successfully installed their 3D wallpapers.
As we can see, with careful planning and execution, you can transform your home with 3D wallpapers. Now, let's conclude.
Transform Your Space: The Power of Proper 3D Wallpaper Installation
Mastering the art of how to remove 3D wallpapers and reinstalling them is not just about giving your home a fresh, new look. It's about unlocking the potential of your space, making it a canvas for your creativity and style. With the best 3D wallpapers for home from Whole 3D, you can transform any room into a stunning masterpiece.
When you follow the best practices for DIY 3D wall panel installation, you ensure a smooth, professional finish that will leave your guests in awe. But beyond aesthetics, proper installation of 3D wall panels and 3D wall tiles also ensures durability, allowing your chosen designs to stand the test of time.
Imagine the satisfaction of stepping back to admire your work, knowing you've created a space that's truly yours. That's the power of 3D wall decor panels. And with Whole 3D's innovative 3D decorative wall panels, the possibilities are endless.
So, why not embark on this DIY journey? With our comprehensive guides and tips at Whole 3D, you'll have all the knowledge and confidence you need to succeed. Remember, every journey begins with a single step. Why not take yours today?
Explore more of Whole 3D's tips and guides and let's transform your home together, one 3D panel at a time.


No comments yet. Be the first to share your thoughts!