
Why Customize Your 3D Wall Panels?
Why Customize Your 3D Wall Panels?
3D wall panels have become a popular choice for homeowners and interior designers alike, thanks to their ability to transform any space with depth, texture, and visual interest. But why stop at the standard designs when you can unleash your creativity and truly make your space unique by customizing your 3D wall panels?
Customizing your 3D wall panels allows you to express your personal style and create a one-of-a-kind look that sets your home apart from the rest. Whether you want to make a bold statement or add subtle sophistication, the possibilities are endless when you take control of the design process.
By choosing to customize your panels, you can also optimize the design to suit your specific space. This means you can select a pattern that complements the room's existing features, such as architectural elements, furniture, and lighting. Customization also enables you to adapt the scale and proportion of the pattern to create the perfect balance and harmony within your space.
Another advantage of customizing your 3D wall panels is the opportunity to experiment with different materials and finishes. This can help you achieve a specific look or feel, such as adding warmth with wood panels or creating a sleek, modern vibe with metal or glass options.
Ultimately, customizing your 3D wall panels is an investment in your home's aesthetics and value. By taking the time to create a design that reflects your taste and enhances your space, you'll be rewarded with a stunning feature that will impress guests and bring you joy for years to come.
Choosing the Right Pattern for Your Space
Tools and Materials You'll Need
Tools and Materials You'll Need
Before you begin customizing your 3D wall panels, it's important to gather all the necessary tools and materials. Here's what you'll need:
- 3D wall panels: Choose the style and design that you want to customize. Whole 3D offers a wide range of options to choose from.
- Measuring tape: Measure the dimensions of your wall panels to ensure that your pattern fits perfectly.
- Pencil and paper: Sketch out your pattern design before you start cutting.
- Utility knife: Use a sharp utility knife to cut out your pattern.
- Sanding block: Sand the edges of your pattern to ensure a smooth finish.
- Paint and brushes: Choose the paint color and brushes that you want to use to finish your customized panels.
- Adhesive: Use a strong adhesive to attach your customized panels to the wall.
It's important to note that safety should always come first. When using a utility knife, make sure to use a cutting mat and wear protective gloves to avoid any accidents. Additionally, make sure to work in a well-ventilated area when using paint and adhesive.
Now that you have all the necessary tools and materials, you're ready to start creating your own unique 3D wall panel patterns.
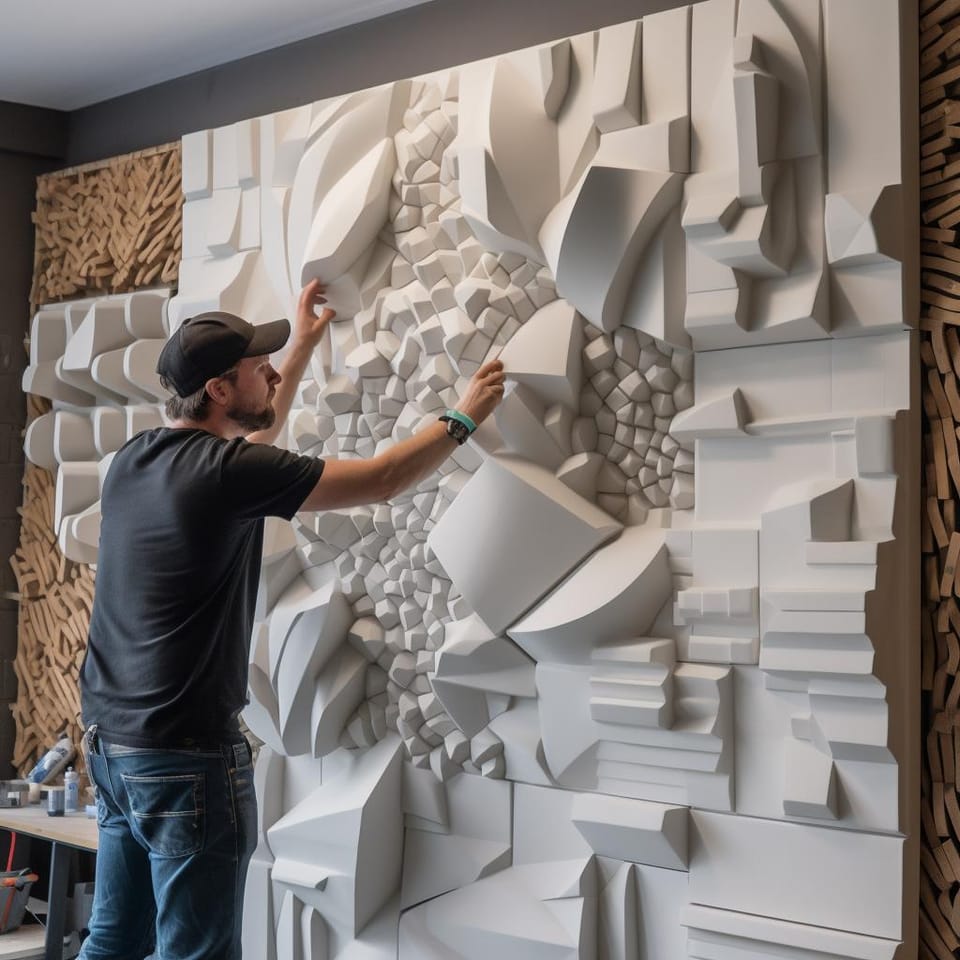
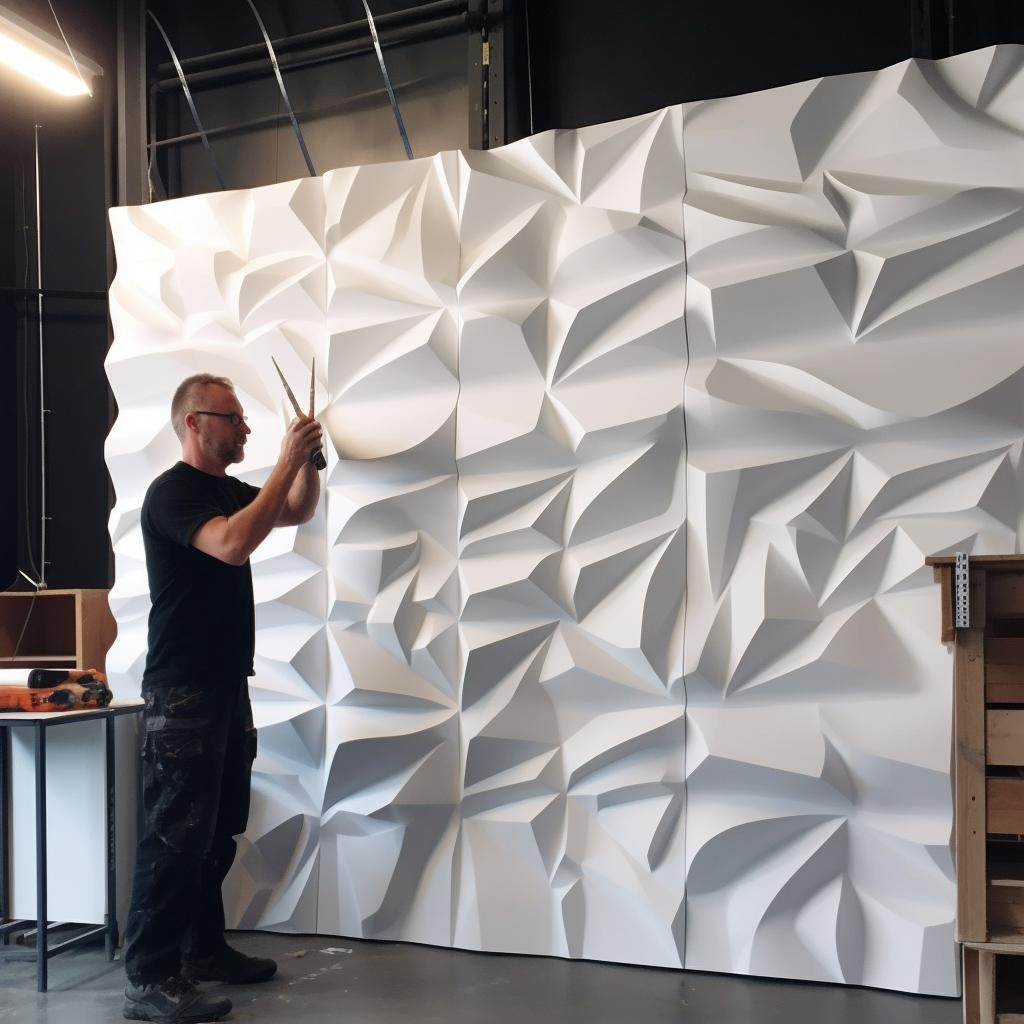
Step-by-Step Guide to Creating Your Own Pattern
Tips for Achieving a Professional Look
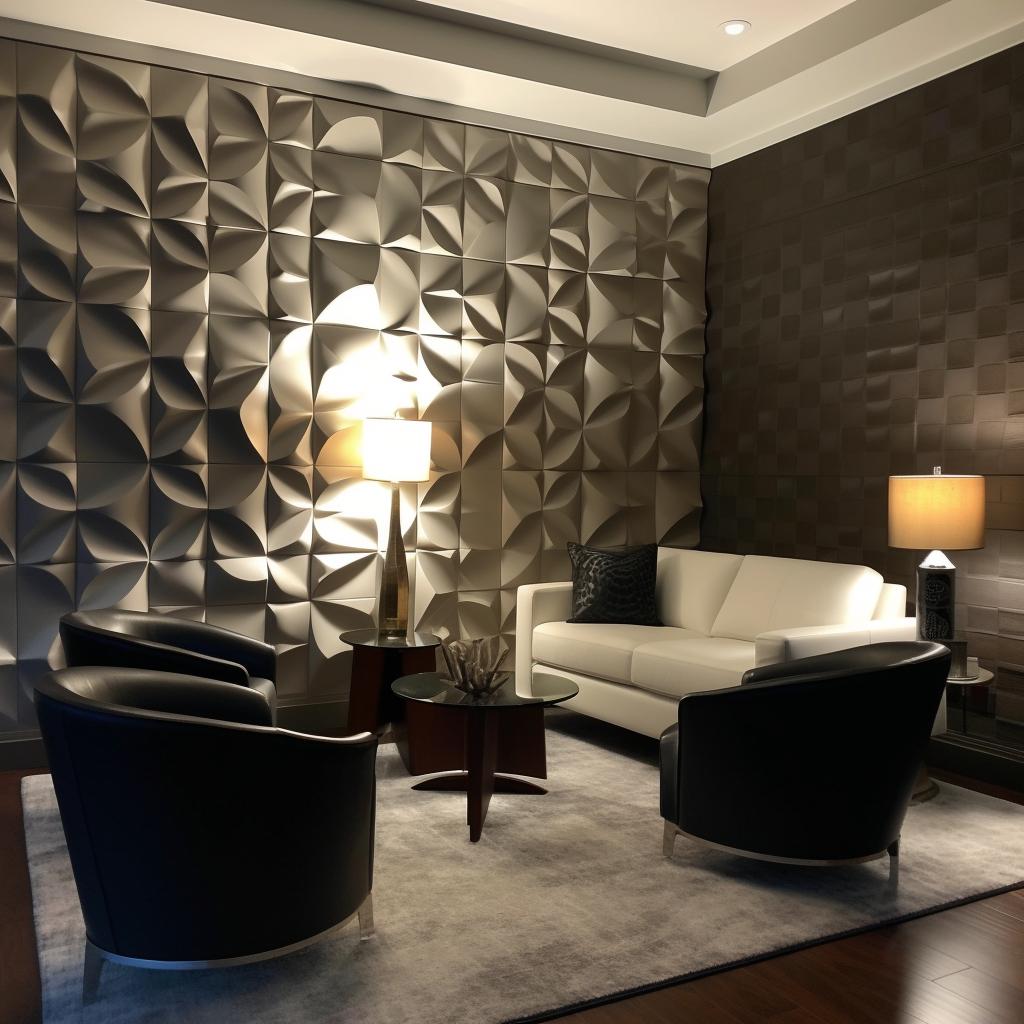
Incorporating Your Customized Panels into Your Decor
Incorporating Your Customized Panels into Your Decor
Congratulations on creating your own unique 3D wall panel pattern! Now it's time to incorporate it into your home decor. Here are some tips to help you seamlessly integrate your customized panels into your space:
1. Choose the Right Wall: Consider the color and texture of the wall where you plan to install your panels. A neutral or solid-colored wall will allow your panels to stand out, while a patterned or textured wall may clash with your design.
2. Placement: Determine the best placement for your panels. Will they be the focal point of the room or an accent piece? Consider the size and shape of the panels and how they will interact with other elements in the room.
3. Lighting: Proper lighting can enhance the beauty of your 3D wall panels. Consider adding accent lighting to highlight the texture and shadows created by the panels.
4. Accessorize: Use accessories to complement your panels. For example, if your panels have a geometric pattern, incorporate geometric-shaped decor pieces into the room.
5. Balance: Don't overdo it with too many 3D wall panels. Balance is key, and too many panels can overwhelm a space.
Remember, your customized 3D wall panels are a reflection of your personal style and creativity. Have fun with it and enjoy the unique touch they bring to your home decor.
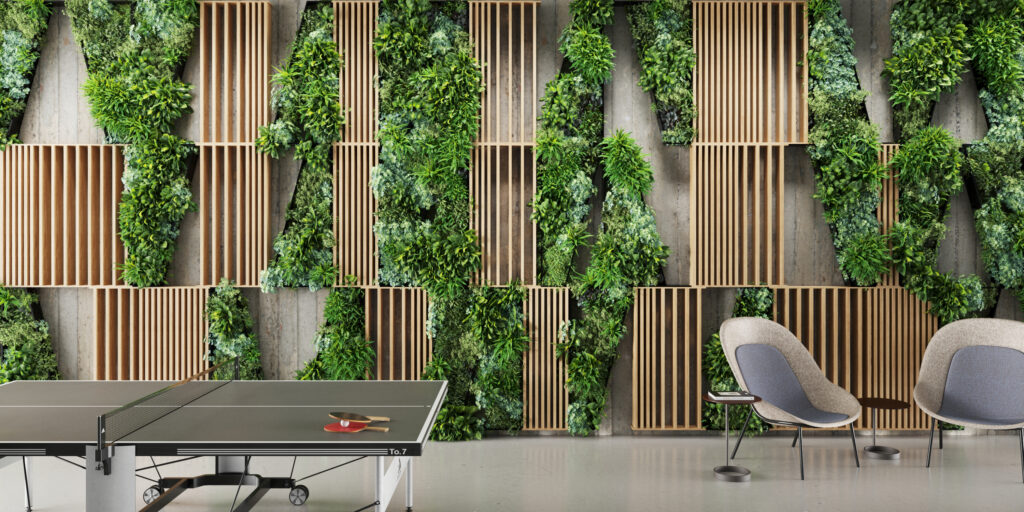
Inspiration for Your Next Project
Inspiration for Your Next Project
If you're looking for some inspiration for your next 3D wall panel project, look no further than Whole 3D's extensive collection of patterns and designs. From geometric shapes to floral motifs, there's a pattern to suit every style and taste.
For a modern and minimalist look, consider a simple geometric pattern in a neutral color like white or gray. This can add texture and depth to a space without overwhelming it. Alternatively, a bold and colorful floral pattern can make a statement in a bedroom or living room.
If you're feeling adventurous, try mixing and matching different patterns and colors to create a unique and eye-catching feature wall. For example, you could combine a geometric pattern with a floral pattern in complementary colors for a fun and playful look.
Don't be afraid to think outside the box when it comes to 3D wall panels. You could use them to create a headboard for your bed, or even to cover an entire accent wall for a dramatic effect. The possibilities are endless!
Remember, the key to a successful 3D wall panel project is to choose a pattern and color scheme that complements your existing decor. With a little creativity and some basic DIY skills, you can transform any room in your home with Whole 3D's innovative 3D wall panels.


No comments yet. Be the first to share your thoughts!