

Why 3D wall panels change a room
3D wall panels transform a flat, boring surface into a focal point without the mess of drywall or plaster work. These lightweight, thermoformed PVC sheets add genuine texture and depth to any space, turning a standard room into a designed interior. Unlike traditional masonry or heavy stone veneers, 3D wall panels are easy to handle and install, making them a practical choice for DIYers who want high-impact results.
The value lies in the visual lift. A single accent wall clad in geometric or organic patterns catches light differently throughout the day, creating shadows and highlights that give the room dimension. This effect mimics the look of expensive custom millwork but at a fraction of the cost. You get the architectural character of a high-end renovation with the simplicity of a weekend project.
Installation is straightforward because the panels are designed for easy mounting. Most systems use adhesive backing or simple mechanical fasteners, meaning you skip the dust, debris, and structural concerns of heavy construction. Whether you are refreshing a living room, updating a home office, or adding drama to a hallway, 3D wall panels offer a clean, modern aesthetic that stands up to daily wear and tear.

Pick the right 3D wall panels for your space
Choosing the right 3D wall panels starts with matching the material to the room’s traffic and moisture levels. The material dictates how the light hits the texture, how long the panel lasts, and how easy it is to cut for odd-shaped walls. PVC and MDF are the most common choices for residential projects, while foam offers a budget-friendly alternative for low-impact areas.
Lighting dramatically changes how 3D wall panels look. Deep grooves cast shadows that add depth, but harsh overhead lights can flatten the effect. Positioning a wall panel where natural light or angled accent light hits it throughout the day will make the texture pop. Consider the pattern’s scale too; large geometric shapes work well in open living areas, while smaller, intricate designs suit accent walls in bedrooms or hallways.
Compare materials and patterns
Use this table to compare the three most common 3D wall panel materials. PVC is water-resistant and easy to clean, making it ideal for kitchens and bathrooms. MDF offers a smooth, paintable surface that mimics wood or plaster but is not water-resistant. Foam is the lightest and cheapest option but is less durable and harder to cut cleanly.
| Material | Durability | Water Resistance | Ease of Cutting |
|---|---|---|---|
| PVC | High | Excellent | Easy (utility knife) |
| MDF | Medium | Poor | Medium (saw required) |
| Foam | Low | Good | Easy (utility knife) |
Explore popular styles
The pattern you choose should complement your room’s existing style. Geometric shapes like hexagons or diamonds create a modern, structured look. Floral or organic patterns add softness and are great for traditional or bohemian spaces. If you are unsure, start with a neutral color palette and let the texture do the talking.

Browse top-rated 3D wall panels
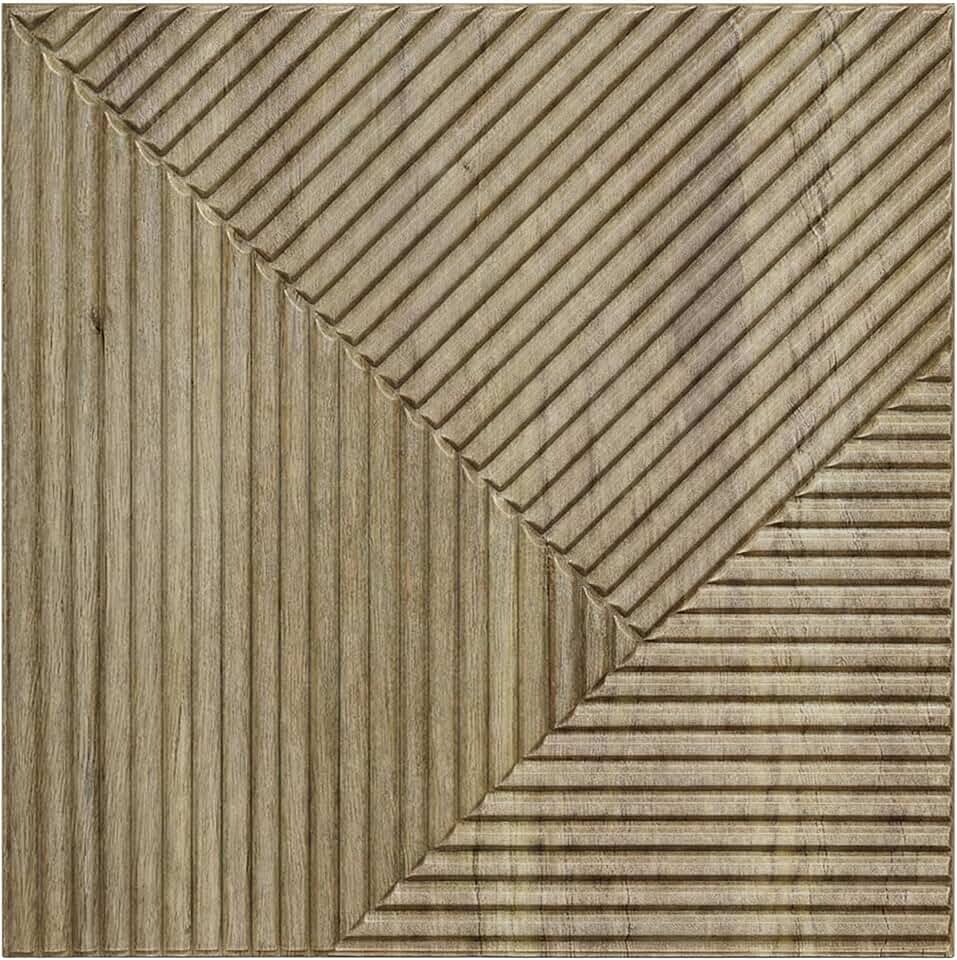
Looking for specific products? Here are some top-rated 3D wall panels available on Amazon, categorized by material and pattern.


As an Amazon Associate, we may earn from qualifying purchases.
Prepare the wall surface properly
Before you begin installing 3D wall panels, the wall surface must be immaculate. Adhesives bond to the substrate, not to dust or grease. If you skip this step, your panels may peel away months later, turning your investment into a costly repair job. Think of the wall like a canvas; if it’s uneven or dirty, the final texture will look flawed no matter how high-quality the panels are.
Start by wiping down the entire area with a damp cloth to remove loose dust and grime. For kitchens or bathrooms, use a mild degreaser to strip away oil and soap scum. Rinse the wall with clean water and let it dry completely. Moisture is the enemy of adhesion, so ensure the surface is bone-dry before proceeding.
Next, inspect the wall for imperfections. Fill any holes, cracks, or dents with spackling compound and sand them smooth. If the wall is highly glossy or painted with semi-gloss latex, lightly sand the surface with fine-grit sandpaper to create a "tooth" for the adhesive to grip. Wipe away the sanding dust with a tack cloth.
Finally, apply a high-quality primer. This step is non-negotiable for porous surfaces like drywall or plaster. Primer seals the surface, ensuring uniform absorption and maximum bond strength. Without primer, the adhesive might soak into the drywall unevenly, leading to weak spots. Once the primer is dry, your wall is ready for the panels.

Measure, cut, and test fit the panels
Start by finding the center of your wall. Use a chalk line to mark a vertical and horizontal crosshair. Working from the center out ensures that the edge cuts on the far sides are symmetrical and balanced, rather than ending with a tiny, awkward sliver of panel. If your room isn't perfectly square, you may need to adjust the center point slightly to account for the trim.
Lay the first panel in the center intersection to check the fit. Most 3D wall panels are modular, so you can snap them together or align them edge-to-edge without adhesive to verify the pattern continuity. This dry fit reveals any spacing issues or uneven walls before you commit to glue. Once you are satisfied with the layout, mark the panel edges on the wall with a pencil.

Always cut on the back side of the panel to keep the visible face clean. If you are using a saw, secure the panel on a stable surface to prevent chipping. For foam panels, a sharp utility knife works best; score the material deeply and snap it cleanly along the line. This method gives you precise control over the final shape, especially for intricate cuts around corners or fixtures.
Adhere panels and secure the edges
With your wall prepped and panels dry-fitted, it is time to commit. The success of a 3D wall panel installation relies heavily on proper adhesion and mechanical support for heavier units. You will apply adhesive to the back of each panel, press it firmly into position, and use clips or nails to anchor the edges, ensuring a flat, secure finish that will last.
Apply adhesive to the back of the panel
Start by applying a high-quality construction adhesive or heavy-duty panel adhesive to the back of the 3D wall panel. Follow the manufacturer’s instructions for the specific adhesive type you are using. Typically, you will apply beads of adhesive in a zigzag pattern or a grid across the back surface, leaving a small gap between the beads to allow for air escape and better bonding.
If you are using peel-and-stick panels, skip this step and simply remove the backing. For traditional panels, ensure the adhesive covers the perimeter and key structural points to prevent sagging or bubbling later.
Press the panel into place
Once the adhesive is applied, carefully lift the panel and align it with your marked guidelines. Press the panel firmly against the wall, starting from the center and working outward to push out any trapped air. Use a level to ensure the panel is straight, making minor adjustments now before the adhesive sets.
Apply even pressure across the entire surface of the panel. For textured panels, you may need to use a soft cloth or a roller to ensure the adhesive makes full contact with the wall. Check the seams with adjacent panels to ensure a tight fit.
Secure the edges with clips or nails
For heavier 3D wall panels, adhesive alone may not be sufficient to hold the weight over time. Use finishing nails or panel clips to secure the edges and corners of the panel to the wall studs or backing board. Drive the nails at an angle (toe-nailing) or use clips that are hidden by the panel’s design.
This mechanical fastening provides extra stability and prevents the panels from shifting or detaching. Ensure the nails or clips are flush with the panel surface to avoid visible protrusions.

Apply beads of construction adhesive in a zigzag pattern across the back of the panel, following manufacturer guidelines for spacing and coverage.
Align the panel with your guidelines and press firmly from the center outward to eliminate air pockets and ensure full adhesive contact.
Use finishing nails or panel clips to anchor the edges and corners, especially for heavier panels, ensuring a stable and long-lasting installation.
Finish and seal the installation
The final phase of installing 3D wall panels transforms a collection of individual pieces into a cohesive architectural feature. This stage focuses on concealing mechanical joints, protecting the surface, and removing the dust of construction. A professional finish relies on precision here more than in the initial mounting.
Caulk and paint the seams
Apply a thin bead of paintable acrylic latex caulk into the visible seams between panels. Use a damp finger or a caulking tool to smooth the bead, ensuring it sits flush with the panel’s surface. This step hides minor gaps and creates a continuous visual plane.
If your 3D wall panels are unpainted MDF or wood, this is the time to prime and paint. Use a high-quality roller with a short nap to get into the textured crevices without leaving streaks. For PVC or foam panels, cleaning is usually sufficient, but check the manufacturer’s guidelines to ensure compatibility with any cleaning agents.
Clean and inspect
Wipe down the entire installation with a soft, dry cloth to remove any dust or caulk residue. Inspect the lighting from an angle to catch any missed imperfections in the seam work or paint coverage. A well-executed finish should look like a single, solid surface rather than a grid of separate panels.
Final installation checklist
Use this checklist to ensure your 3D wall panel installation is complete and durable:
-
All seams are caulked and smoothed
-
Paint or finish is fully dry and even
-
Surface is free of dust and adhesive residue
-
Lighting reveals no visible gaps or uneven edges
-
Tools and materials are cleared from the work area
Common 3d wall panel installation: what to check next
Homeowners often pause before starting a 3D wall panel installation project because of concerns about maintenance, future changes, and room suitability. These decorative panels are designed to be durable and adaptable, but understanding their specific needs helps ensure a successful finish.
How do I clean 3D wall panels?
Dust accumulates in the crevices of textured panels more easily than on flat walls. Use a vacuum cleaner with a soft brush attachment to remove loose dust weekly. For deeper cleaning, wipe the surface with a damp cloth and mild soap. Avoid abrasive scrubbers or harsh chemicals, which can damage the finish or texture of the material.
Can I paint 3D wall panels?
Most 3D wall panels made from PVC, MDF, or polyurethane are pre-finished and do not require painting. However, if you want to change the color, check the manufacturer’s guidelines first. Some materials accept water-based latex paint well, while others may repel it or suffer damage from solvents. Always test a small, inconspicuous area before committing to a full coat.
Are 3D wall panels suitable for bathrooms?
Suitability depends entirely on the material. PVC and waterproof polyurethane panels are excellent for bathrooms and kitchens because they resist moisture and mold. Avoid untreated wood or MDF panels in high-humidity areas unless they are specifically sealed for wet environments. Ensure proper ventilation in any room where you install non-waterproof panels to prevent warping over time.
How do I remove 3D wall panels later?
Removal ease varies by installation method. Peel-and-stick panels generally come off cleanly, though some adhesive residue may remain on the drywall, which is easy to sand or wipe away. Panels installed with construction adhesive or nails may require more effort and could leave small holes or surface marks. Always check the warranty or product specs to understand the removal process before installing.
No comments yet. Be the first to share your thoughts!