
First Impressions: 3D Panels Today
Textured wallpaper from the past often looked unimpressive and was a nightmare to install. Thankfully, 3D wall panels have improved significantly. What began as a purely aesthetic choice has evolved into something innovative, with "smart" panels offering integrated features and an accessible DIY experience.
The biggest shift isn’t just the design possibilities, though those are substantial. It’s the ease of installation. Early versions demanded a level of patience and skill that most homeowners lacked. Now, with improved materials and interlocking systems, a weekend project can transform a room.
These panels are surging in popularity. They add depth, texture, and a modern feel to any space, moving beyond a trend to become a design staple. This is largely due to how much easier they are to work with now.
Affordable, high-quality panels are now widely available. What once felt like a luxury is now within reach for a wider audience. These panels aren't just about covering walls; they're about creating immersive environments, achievable with the right tools and guidance.
Understanding Smart 3D Panel Tech
What makes a 3D panel "smart"? It goes beyond the raised design. The most common feature is integrated lighting, typically LEDs. These can be static, color-changing, or even sound-reactive, offering a dynamic visual element. Control via an app or smart home system is increasingly common.
Sound dampening is another benefit. The panels' depth and material absorb sound, reducing echo and creating a more comfortable environment, useful in home theaters or open-plan living spaces. Some experimentation with integrated sensors is occurring, though this technology is new and adds to the cost.
Tongue-and-groove systems are now widely adopted. Manufacturers create panels with interlocking edges and concealed screw holes (with plugs included). This simplifies installation, creating a nearly seamless finish.
Panels are made from PVC, wood fiber composites, and bamboo. PVC is affordable and water-resistant, suitable for bathrooms or kitchens. Wood fiber composites offer a natural look and feel, while bamboo is a sustainable option. Each material has pros and cons regarding durability, weight, and ease of cutting.
Tools & Materials: What You'll Need
Gather the right tools and materials before you start. Don’t skimp on quality, especially adhesive. Construction adhesive is your best bet; the YouTube video by Freecas Designs highlights its importance for a strong, lasting bond.
Here's a comprehensive checklist:
• 3D wall panels (calculate the square footage needed, adding 10% for waste)
• Construction adhesive (Gorilla Glue is a reliable brand)
• Measuring tape
• Level
• Utility knife
• Saw (a fine-tooth saw or jigsaw works well for cutting)
• Safety glasses
• Gloves
• Caulk or filler (for seams and edges)
• Primer (if your wall is porous or uneven)
• Plugs (if your panels have concealed screw holes)
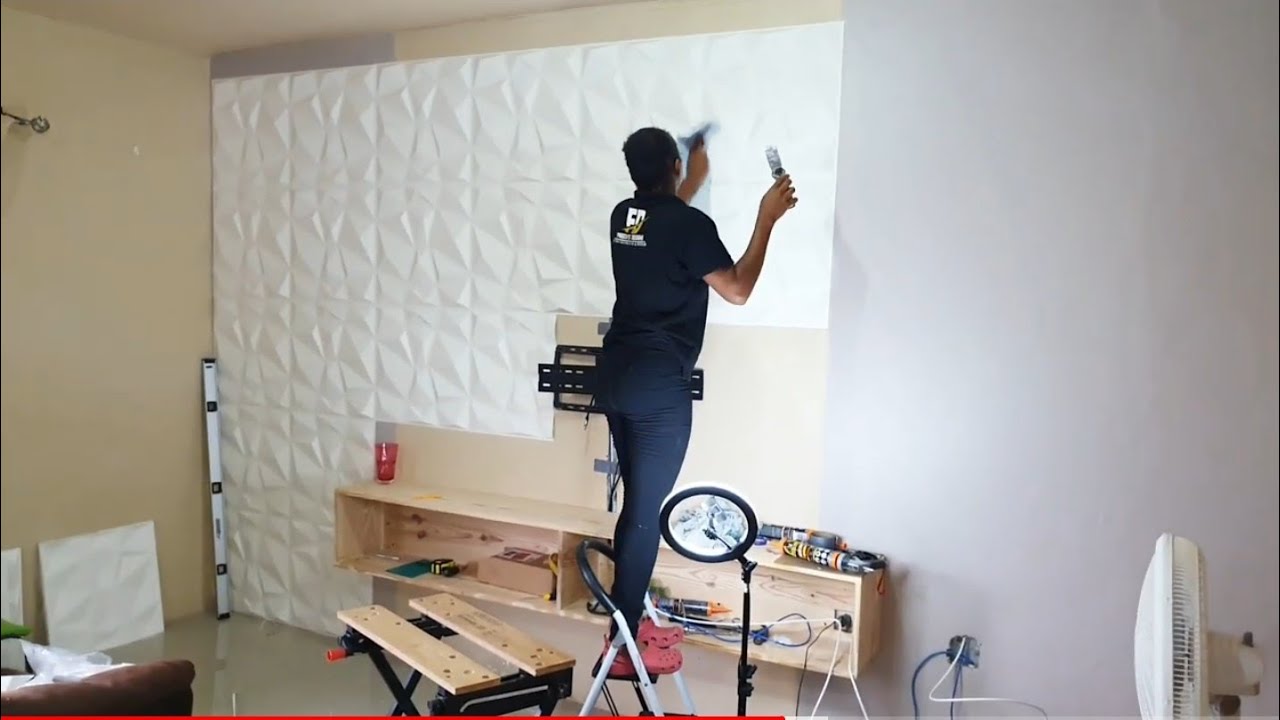
Preparing the wall is often overlooked. It needs to be smooth, clean, and primed. Any imperfections will show through the panels, so take the time to patch holes and sand down rough spots. This is where many DIY projects go wrong.
Step-by-Step Installation: The Core Process
The installation process can seem daunting, but breaking it down into steps makes it manageable. First, plan your layout. Dry-fit the panels on the floor to visualize the arrangement and identify areas requiring cutting. This saves time and frustration later.
Next, apply the adhesive. Follow the manufacturer’s instructions. Apply beads of adhesive to the back of each panel, focusing on the edges and center. Don’t overdo it; too much adhesive will squeeze out and create a mess. The Freecas Designs video on YouTube offers a visual guide for adhesive application.
Now, place the panels. Position each panel on the wall, pressing firmly to ensure good contact. Use a level to check horizontal and vertical alignment. A second set of hands can be helpful here.
Cutting panels to fit around obstacles like windows, doors, or light switches is inevitable. Measure accurately and use a fine-tooth saw or jigsaw for clean cuts. Account for the panel’s thickness when measuring. Prioritize precision.
Corners can be tricky. You’ll likely need to cut panels at an angle for a snug fit. Dry-fitting helps here. Experiment with angles until you achieve the desired result. A miter saw can be useful for precise angled cuts.
Continue this process across the wall. Step back regularly to assess progress and make adjustments. Patience is key to a professional finish.
If panels have concealed screw holes, use the provided plugs to cover screws after the adhesive dries. This adds a polished look and hides imperfections.
Allow the adhesive to cure completely according to manufacturer instructions before finishing. This generally takes 24-48 hours.
Cutting & Fitting: Tackling Tricky Spots
Cutting 3D panels requires finesse. A fine-tooth saw provides clean cuts without splintering the material. A jigsaw is effective for curved cuts or intricate shapes. Always wear safety glasses when cutting.
undefined panels are to cut, thanks to the materials used. However, even with easy-to-cut panels, accuracy is paramount. Double-check your measurements before making any cuts, and use a sharp blade for the cleanest results.
Outlets and light switches require careful planning. Measure the distance from the edge of the panel to the center of the fixture. Transfer these measurements to the panel and carefully cut out the opening. It’s better to start with a smaller opening and gradually enlarge it if needed.
Minimizing waste is important, especially if you’re working with a limited amount of material. Arrange the panels strategically to maximize coverage and reduce the number of cuts required. Utilize leftover pieces for smaller sections or to fill in gaps.
Finishing Touches: Seams & Edges
Once the panels are installed, it’s time to address the seams and edges. Use a high-quality caulk or filler to conceal any gaps between panels. Choose a color that matches the panels or the wall color, depending on the desired effect.
Apply the caulk or filler evenly along the seams, using a caulk gun or putty knife. Smooth out the excess with a damp cloth. This creates a seamless look and prevents dust and debris from accumulating in the gaps.
If there are gaps around the edges of the installation, fill them with caulk or filler as well. This is especially important if the panels are butting up against a ceiling or floor.
If your panels have concealed screw holes and plugs, ensure they are securely in place and flush with the surface. You can lightly sand them down if necessary. Painting over the filler and plugs to match the wall color will further enhance the seamless look.
Pay attention to detail during this stage – it’s what separates a good installation from a great one.
Troubleshooting Common Problems
Even with careful planning, you may encounter some challenges during installation. Panels not sticking is a common issue. Ensure the wall is clean, dry, and primed, and that you’re using a sufficient amount of adhesive. Applying pressure to the panels for a few minutes after installation can also help.
Uneven surfaces can cause panels to lift or misalign. Use shims or leveling compound to correct any imperfections before installing the panels. A level is your best friend here.
Misaligned panels can be a headache. If you catch the misalignment early, you may be able to gently pry the panel loose and reposition it. If the adhesive has already dried, you may need to carefully cut the panel and replace it.
Damaged panels during cutting are frustrating, but inevitable sometimes. Have extra panels on hand to account for mistakes. If a panel is only slightly damaged, you may be able to conceal the damage with caulk or filler.
If adhesive gets on the finished surface, wipe it off immediately with a damp cloth. If the adhesive has dried, you may need to use a solvent or scraper to remove it, being careful not to damage the panel.
Beyond Installation: Lighting & Design Ideas
Now that your 3D panels are installed, it’s time to unleash your creativity. Accent walls are the most popular application, creating a dramatic focal point in any room. Consider using different colors and textures to create a unique look.
Headboards are another great option, adding depth and texture to the bedroom. Room dividers can also be created using 3D panels, defining spaces and adding visual interest. Explore different patterns and arrangements to find what suits your style.
Lighting plays a crucial role in enhancing the impact of 3D panels. Uplighting can accentuate the texture and depth, while backlighting can create a subtle glow. Experiment with different color temperatures and intensities to achieve the desired effect.
Browse the Whole3D product catalog for inspiration and explore the endless possibilities of 3D wall decor. From modern geometric designs to natural stone textures, there’s a panel to suit every taste and style. Don’t be afraid to mix and match different panels to create a truly unique look.


No comments yet. Be the first to share your thoughts!